How to Сopy "Shared with me" Files from One Google Drive to Another
There are several ways to transfer "Shared with me" files from one account to another:
- Copy them automatically using a migration app like VaultMe
- Download and reupload them manually
- Re-share the files with the second account (this will not change ownership)
- Save files to your Drive and migrate all content
Google Takeout does not export "Shared with me" items, so this option does not work in this scenario.
- How to copy "Shared with me" files from one Google Drive to another
- Option 1 (automatic). Copy "Shared with me" and "Owned by me" files together
- Option 2 (manual). Re-share "Shared with me" documents with your new account
- Option 3 (manual). Export "Shared with me" files to hard drive and upload them to the new account
- Option 4 (manual). Copy "Shared with me" documents to Drive and migrate them to a new Google Drive account
- Does Google Takeout back up "Shared with me" files?
- Frequently asked questions about exporting "Shared with me"
- Conclusion
- Related articles
How to copy "Shared with me" files from one Google Drive to another
When your classmates, co-workers, friends, or family share documents with your Google account, these files appear in the "Shared with me" folder in your Drive. You may be using them often, but you actually do not own them.
If you need to switch from one Google account to another, you'd probably want to transfer all documents to your new Drive. That includes the files that you have created or uploaded yourself and the documents that are shared with you.
Your first intention might be to use Google Takeout, but, since shared files are owned by other people, Google Takeout does not include shared files in the export file.
So how exactly do you copy the files from the "Shared with me" folder to another account then?
The easy way would be to copy all your documents together using VaultMe.
VaultMe migrates all files, both owned and shared, automatically—which is a much quicker and easier way to transfer your Drive content to a new account.
There are other options that you may consider, too. As you will see below, they all have major downsides, but they may still work for some people.
It is important to understand that, since "Shared with me" files are owned by somebody else, the owner of the files can control how others use these documents. The owner may disable downloading, copying, and/or re-sharing.

All methods described below will only work for "Shared with me" files that do not have limited permissions set by the owner.
Option 1 (automatic). Copy "Shared with me" and "Owned by me" files together
To avoid the trouble of even thinking about which files are owned by you and which are shared with you, use VaultMe to migrate all your Google Drive content at once.
Automated tools like VaultMe make the painful copying process easy.
Why use VaultMe:
-
It can copy the files from the "Shared with me" folder.
-
It can export shared drives to another account.
-
It preserves the organization of the files and folders and does not involve any manual work.
-
VaultMe is quick, and it works online. You can close the browser and even turn off the computer.
-
VaultMe migrations are super easy to set up.
-
The VaultMe app is secure and is trusted by users all over the world — and you should see the reviews!
VaultMe will create an archive of your "Shared with me" documents in another account. Any future changes to the documents in the old Google Drive will not be reflected in the new account.


Option 2 (manual). Re-share "Shared with me" documents with your new account
This option will make the shared documents in the old Drive appear in the "Shared with me" section of your new Drive.
We do not recommend this method for people who want to save the content of their student accounts. Student accounts are often deleted in bulk by administrators. When the account of someone who shares a file with you is deleted, the file gets deleted, too. You will no longer be able to access it, even if you have reshared it.
To re-share the files:
-
Go to the "Shared with me" section in your Drive.
-
Select the files that you wish to access from your new account.
-
Right-click on them and select "Share".
-
Type in your new account's email address and click "Done".
-
Go to the "Shared with me" folder in your new Drive to view the files.
Please note: If the person who shared the files with you deletes them or removes your access, you will no longer be able to see those documents in the "Shared with me" folder in your new account.
Option 3 (manual). Export "Shared with me" files to hard drive and upload them to the new account
Using this method, you will create copies of the "Shared with me" documents in the new account. Any changes to the original shared files in the old Google Drive will not be reflected in the new account.
This option involves downloading "Shared with me" documents to the hard drive manually and then uploading them to the new Drive.
If you select multiple files, Google will put them all into a zip archive. If you wish to use the files from your new account just as you were using them from the old account, you will need to unzip the archive and reorganize the files before you upload them to the new account.
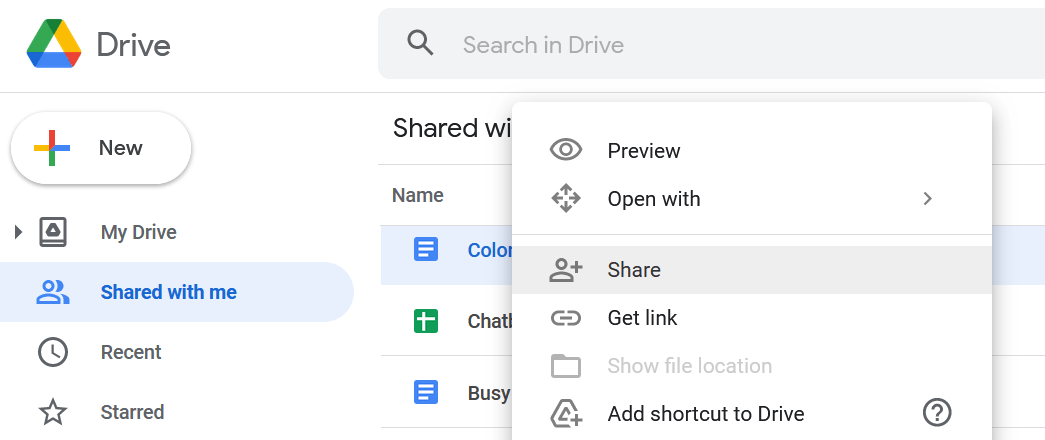
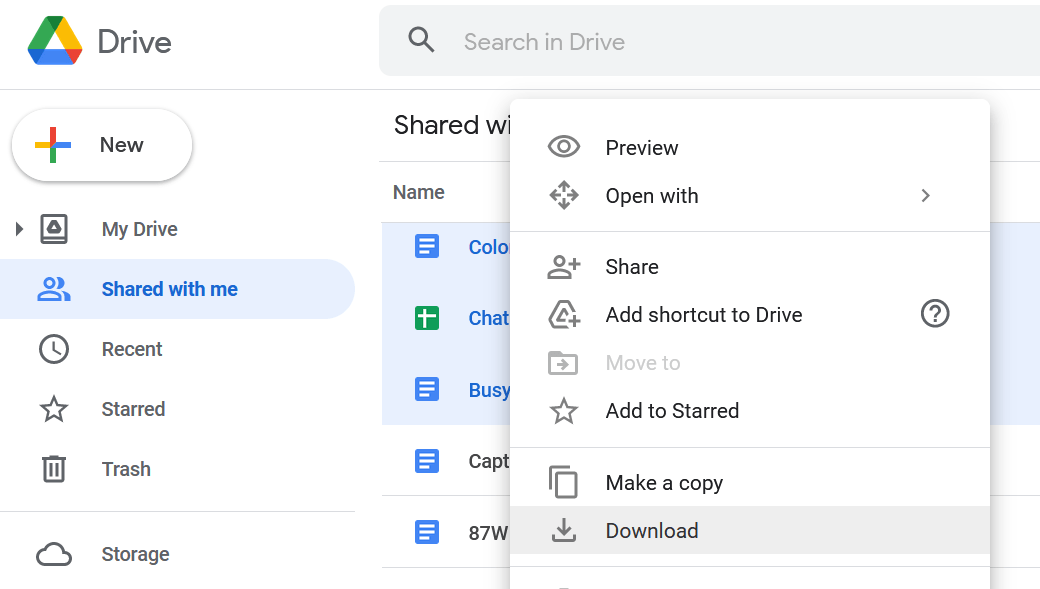
To download and upload the files:
-
Go to the "Shared with me" folder in your old Drive.
-
Select the files that you wish to copy.
-
Right-click on them and select "Download".
- Upload the files to your new Drive.
Note that Google will convert your downloaded files to Microsoft Office format (Google Docs to Microsoft Word, Google Sheets to Microsoft Excel, etc.). After you upload them to the new account, they will not be converted back to their original format by default.
To restore the format, before you upload the files, do the following:
-
Go to your new Drive.
-
Click the gear icon in the top right corner and select "Settings."
-
Go to "General."
-
Go to "Convert uploads" and tick the box that says "Convert uploaded files to Google Docs editor format."
Please also note that the files in some native Google formats (such as Google Forms and other less popular formats) cannot be downloaded.
Option 4 (manual). Copy "Shared with me" documents to Drive and migrate them to a new Google Drive account
Using this method, you will be able to save archival copies of the "Shared with me" documents in the new account. Any changes to the original shared files in the old account will not be reflected in the new Drive.
You can consider this option if you are planning to use Google Takeout to migrate all your files to the new Google account.
Because Google Takeout does not export "Shared with me" files, you need to transfer these files to your old Drive first to make them available for a Google Takeout export.
Using this method, you will create copies of the shared documents in the "My Drive" folder of your old account. You will be the owner of these copies, and they will use the storage space in your Google Drive. So before you begin, make sure you have enough free storage space.
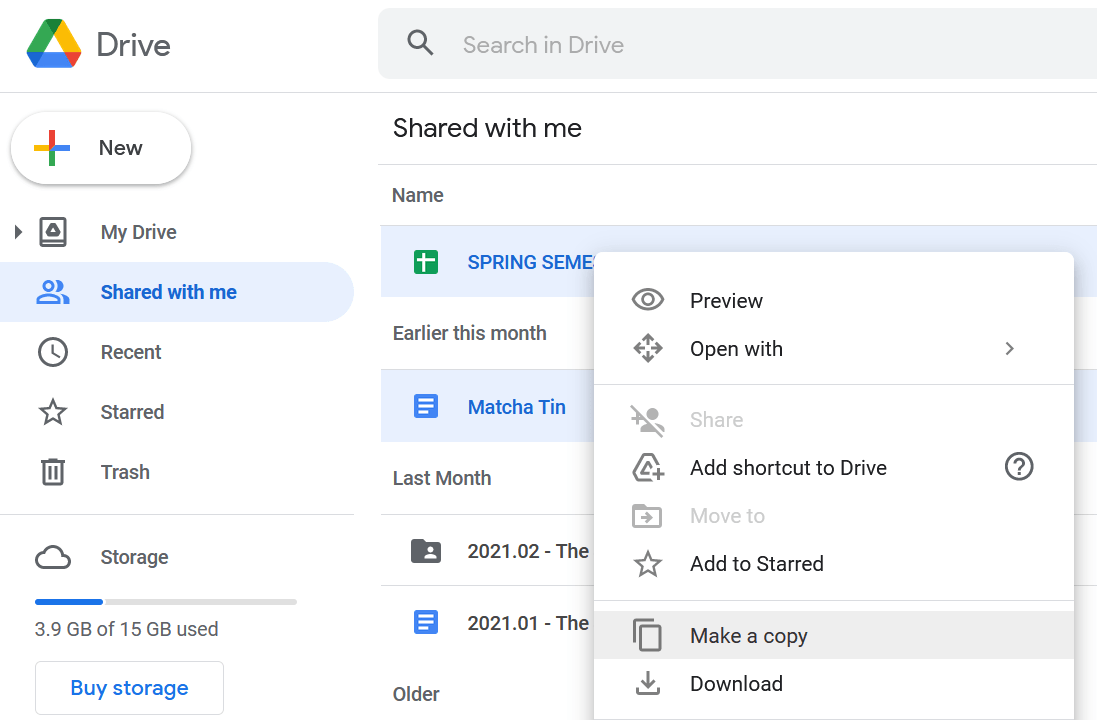
To create copies:
-
Go to "Shared with me" in your old Drive.
-
Select the files that you wish to save.
-
Right-click on them and select "Make a copy".
- Go to My Drive and view the files.
There are important things that you should consider before you start:
-
Folders cannot be copied. You will be able to create only copies of individual files.
-
All your files will go to the "My Drive" folder. You won't be able to select folders where you wish these copies to go. This will involve additional organization after you finish copying your files.
-
All copied files will be renamed to "A copy [File name]" automatically.
-
Large files (such as videos) will copy slowly, and the copying process may fail.
After you create copies of "Shared with me" documents in your Drive, you will need to migrate them to your new Drive account.
This can be done manually using Google Takeout or automatically using VaultMe.
This is why we recommend using VaultMe for Drive migrations. It saves the trouble of sorting out which files are owned by you and which are shared with you.
The app migrates both owned and shared files, including files stored in shared drives, so instead of creating copies and finding ways to migrate them, give VaultMe a try.
Does Google Takeout back up "Shared with me" files?
Many users expect Google Takeout to export shared files when they choose to copy their Drive files manually. However, this expectation often leads to confusion and disappointment.
Google Takeout only exports the files that you own—those created by you or transferred to your ownership within Google Drive. This limitation means that if you rely on Google Takeout for a complete backup of your Google Drive, you'll miss out on any content that has been shared with you, regardless of its importance or frequency of use. For users managing collaborative projects or shared workspaces, this can be a significant oversight.
Consider using VaultMe to secure not only the files you created but also the files owned by others that you want to retain for future use.
Frequently asked questions about exporting "Shared with me"
Does Google Backup and Sync download "Shared with me" files?
"Shared with me" items are represented as links, not the actual files in the Google Drive desktop app. If you want to save these items to your hard drive, you need to download them using a browser.
How do I copy data from a shared drive?
Unless the shared content is protected from copying by the owner, you can create copies in a shared drive and then move these copies to your own Drive.
However, if you need to create copies in a different account, this wouldn't work. Consider using tools like VaultMe to copy shared drives to another Google account. Ensure that you have all the necessary permissions to do so before you begin.
Conclusion
You can copy the files from the "Shared with me" folder to your new Google Drive account automatically or manually.
The automatic option is preferable because it involves no manual work and provides fast and precise results. Use VaultMe if you want the job to be done quickly and efficiently. With VaultMe, you will be able to copy both the files from the "Shared with me" folder and all shared drives to which you have been added.
Manual methods are less reliable and more time-consuming. But they are worth considering if you are willing to do most of the work yourself and know how to fix possible issues.
Regardless of the method chosen, this guide provides comprehensive instructions to ensure a smooth transition of your important documents.
Related articles
Need to change your Gmail address? Find out if it's possible with your account: How to Change a Gmail Address.
Want to try extracting your Google account information using Google Takeout? Learn what to expect: Alternative to Google Takeout.
Have to transfer Google Photos to a different account? This article provides step-by-step instructions: How to Transfer Google Photos to Another Account.