How to Backup Gmail: Four Methods
You may be looking for a way to backup emails from Gmail for many reasons. Whether you want to save the emails before deleting a Gmail account or simply want to have peace of mind, backing up Gmail is a wise choice.
There are four ways to back up Gmail:
- Migrating emails to another account using a migration app like VaultMe
- Exporting emails to a hard drive
- Downloading emails in an email app
- Forwarding emails to another account
In this article, we will explore four methods for backing up your Gmail messages. From creating online copies to keeping copies of your emails on a hard drive, we've got you covered.
- Option 1. How to backup Gmail emails to another account with VaultMe
- Option 2. How to backup all Gmail emails to a hard drive
- Option 3. How to backup or save Gmail emails for offline access
- Option 4. How to forward Gmail emails to another account
- Choose a backup method for Gmail emails
- Why use a Gmail backup tool
- Frequently asked questions about backing up Gmail
- Conclusion
- Related articles
Option 1. How to backup Gmail emails to another account with VaultMe
You can transfer your emails to another account automatically or manually, but in this article, we focus on the automatic option because it's quicker, easier, and safer. (If you prefer to go down the long and error-prone manual route, you can use our instructions for a manual transfer.)
The easy way to backup your Gmail messages to another Gmail account or a different email service provider is to use VaultMe, a secure app that automates email and contacts migration.
- VaultMe backs up Gmail emails with attachments.
- VaultMe copies the folder structure of a Gmail account and retains email formatting, dates, and read/unread status.
- VaultMe can back your Gmail account to Gmail, Outlook, Yahoo, AOL, and many other email providers.
- VaultMe will back up all Gmail messages, including emails from custom labels.
- The app can also copy your Gmail contacts as well as Drive files and calendars.
- The app is 100% automated (no manual work)
- VaultMe works online, so you can close the browser while it is copying your content.
- The setup is quick and easy.


VaultMe will create a one-time backup of your Gmail emails in a different account. It will not automatically forward any future emails received in the source to the destination or change settings in either account.
To create a one-time backup of Gmail emails in another account:
- Go to https://app.vaultme.com.
- Connect your original Gmail account as a source account.
- Connect any other email account (Outlook, Gmail, AOL, Yahoo, etc.) as a destination account.
- Start your migration. Feel free to close your browser! You will get an email when your migration finishes.
After you've transferred your Gmail messages to another account, you can set up email forwarding to back up any future emails.

Option 2. How to backup all Gmail emails to a hard drive
This is the fastest way to create a backup, but the archival file will only be useable if you import it to an email app that supports the .mbox format.
Using this method, you can download an archive of your emails from Gmail to a hard drive with the help of Google Takeout. Note, however, that Google Takeout has certain limitations.
To export Gmail emails:
- Sign in to your account and navigate to Google Takeout: https://takeout.google.com/settings/takeout.
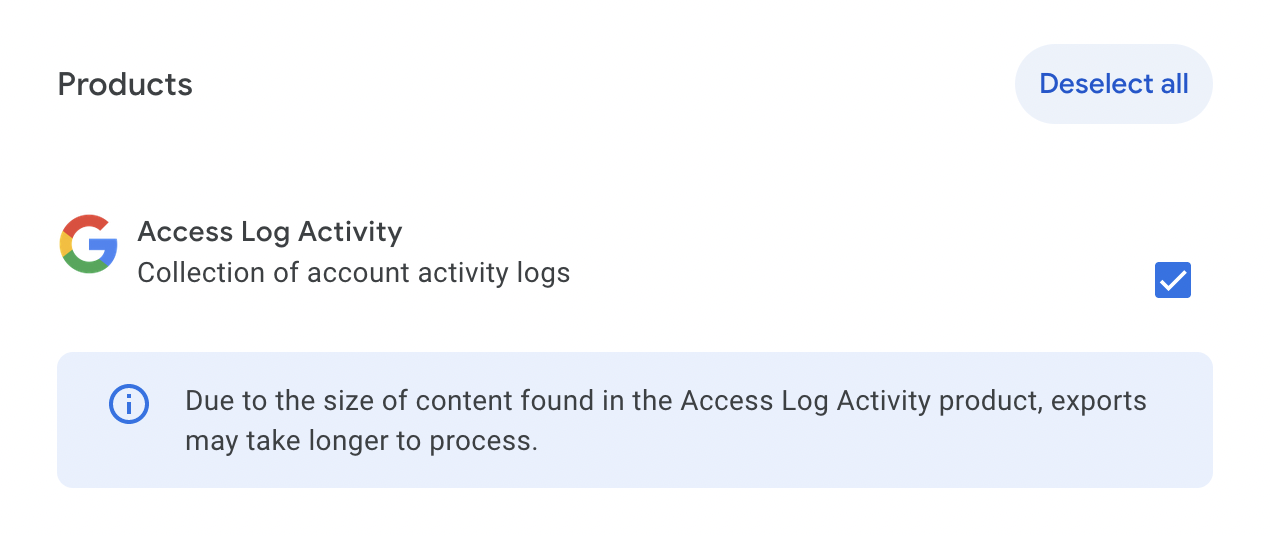
- Click "Deselect All."
-
Scroll down, select "Mail," and then click the "Next step" button at the bottom of the page.
-
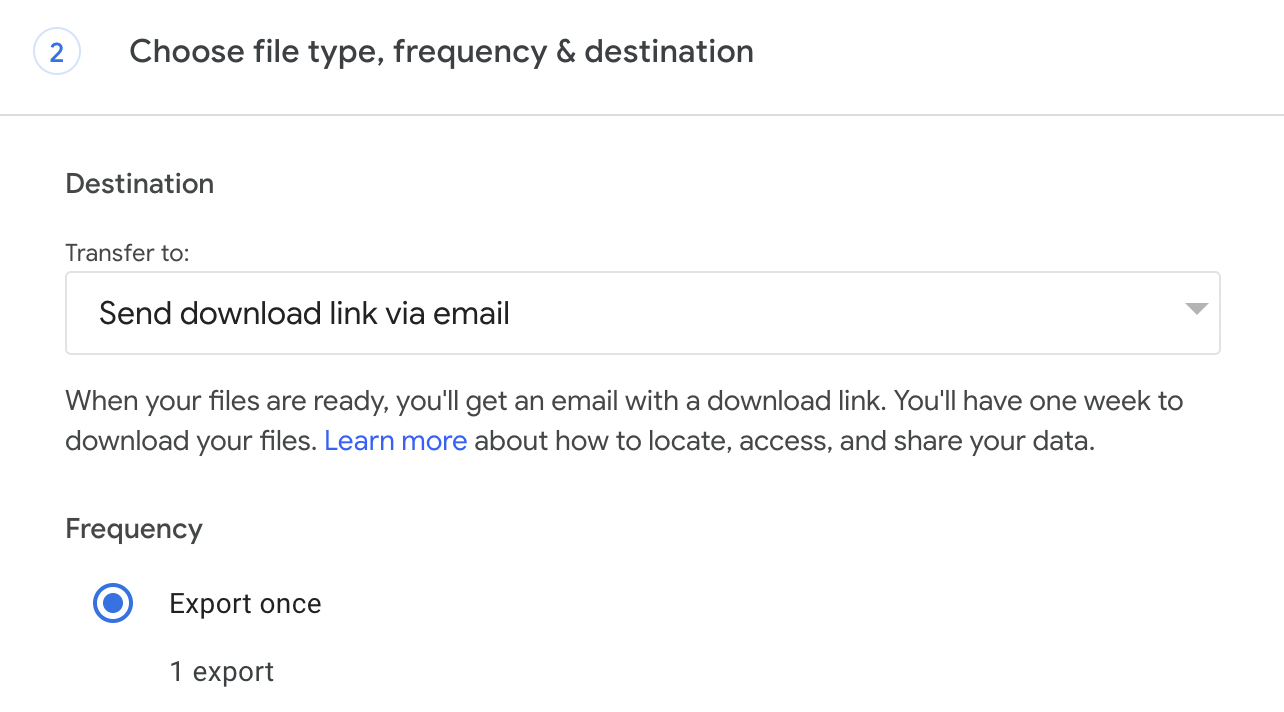
Choose "Send download link via email" and "Export once."
-
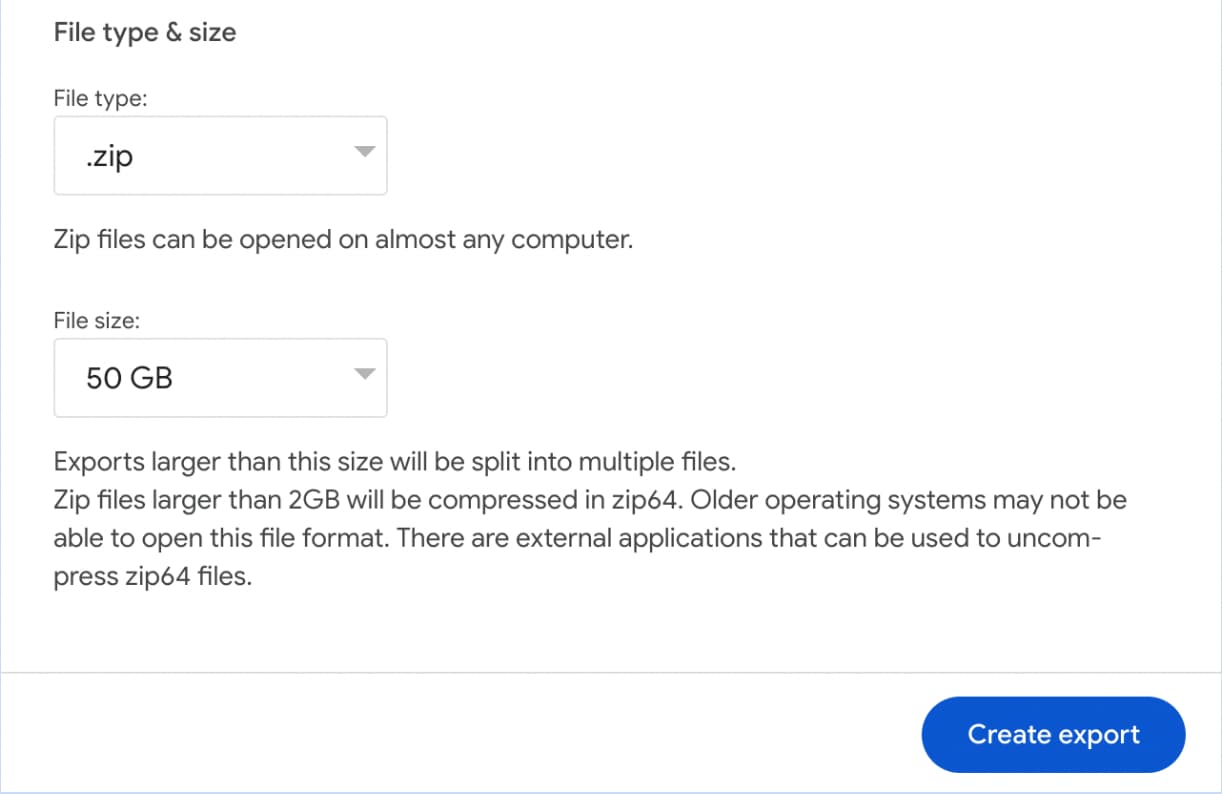
Select the file type for your Google Takeout export. Zip tends to be the most widely supported format, so we recommend using that.
-
Pick the size of the file. If the size of the archive exceeds the size you've selected, Google Takeout will create multiple files.
-
Click "Create export."
-
Wait for the archive to be delivered.
-
Save the .mbox file(s) to your computer.
If you want to import your email archive after you've downloaded the file, you can use our instructions. We recommend Thunderbird because it's free and works on any platform, but you can use any email client that supports .mbox files.
Option 3. How to backup or save Gmail emails for offline access
For this method, you need to have an email app such as Thunderbird, Outlook, or Mailbird installed on your computer.
To download Gmail messages to an email app:
-
Connect your Gmail account to the app. Use Gmail's instructions if needed.
-
Wait for the account to be fully synced with the app.
-
Enable the offline mode in the app and check the results.
The limitations of this method include the following:
-
If you delete the email app from your computer, your email backup will be deleted as well.
-
Depending on the email application that you use, there is a risk that some of the emails will be downloaded only partially. If you go offline, you won't be able to view the contents of these emails or access their attachments.
-
If you accidentally delete something while using your account online, these changes will be synced with the app, too, and the content will be lost anyway. The only workaround is to keep the app offline and do periodic syncs.
-
If you need to back up your Gmail contacts, you'll have to do that separately.
Option 4. How to forward Gmail emails to another account
With this method, you will only be able to back up new email messages. To back up the existing email, use one of the methods outlined above.
If you enable email forwarding in your Gmail account, a copy of each message that you get will be sent to another account.
To enable email forwarding in Gmail:
- Go to your Gmail account.
- In the top right corner, click the gear icon, then See all settings.
- Click the Forwarding and POP/IMAP tab.
- Navigate to the "Forwarding" section and click Add a forwarding address.

- Add the email address you want to forward messages to.
- Click Next, then Proceed, then OK.
- Wait for a verification message to be received in the account that will receive copies of messages. Follow the instructions in the verification message.
- Go back to your Gmail account and refresh the page.
- Click the Forwarding and POP/IMAP tab.
- Navigate to the "Forwarding" section and select Forward a copy of incoming mail to.
- Select "Keep Gmail's copy in the Inbox."
- Click Save Changes at the bottom of the page.
Choose a backup method for Gmail emails
Before choosing a backup method, you should decide whether to keep a copy of your Gmail messages online or offline.
We generally recommend backing up your Gmail emails to another online email account.
Here are some of the key limitations of an offline backup that make an online backup a more viable option:
- If you choose to back up your Gmail account to a computer or an external hard drive, your emails will only be usable if you install a desktop email application and import the email archive file.
- Exporting and importing messages for offline storage is a potentially slow and error-prone process.
- Any damage to the hard drive will put the safety of the email backup at risk.
- Your backup will not be available online, which will limit your ability to browse old emails on the go.
Due to these limitations, saving a backup of your Gmail email to another account is a more secure option. However, combining several backup methods is also beneficial in many cases.
Why use a Gmail backup tool
Using a Gmail backup tool rather than copying your messages manually is a more reliable and secure way to preserve your email data.
Migration tools are designed to automate the process of copying emails to another account, saving time and reducing the risk of human error. They typically maintain folder structures, labels, attachments, and metadata, such as timestamps, which can be lost or scrambled with basic export/import methods.
For anyone managing important or sensitive mail, a specialized tool ensures nothing gets missed or corrupted in the process.
Frequently asked questions about backing up Gmail
Do emails need to be backed up?
Backing emails up is not an absolute necessity for everyone, but it is a good practice for people who rely on email for important communication. Having a backup copy means you will always be able to find important information even if you accidentally delete something.
How do I back up my Gmail for free?
You can download your emails to a hard drive or transfer them manually to another account. However, "free" methods tend to be unreliable and time-consuming.
Can I transfer all emails from one Gmail to another?
Yes, this can be done automatically using a third-party migration service or manually using a desktop email client. The choice of method depends on the resources that are available to you and the size of your email archive.
Is there a way to back up all Gmail emails?
Yes, you can back up all Gmail emails to a different account or an email client. Use the instructions provided in this article to take a backup of your Gmail emails.
How do I download a copy of all emails in Gmail?
Export your emails using Google Takeout or an email client. However, the archive will be unusable unless you import it into a different account or an email client.
How do I back up my emails to a hard drive?
You can export your emails into a .mbox file using Google Takeout or an email app. Note, however, that this email archive will only be useable if you export the downloaded file into a desktop email application like Thunderbird or Outlook.
Conclusion
Whether you're preparing to close your Gmail account or simply looking for peace of mind, having a reliable backup strategy is reasonable. In this article, we've explored several methods for backing up your Gmail messages: transferring them to another account, storing them on a hard drive, syncing them with an email app for offline access, and forwarding emails to another account.
Each method has its pros and cons, and the choice largely depends on your specific needs and preferences.
The easy way to back up Gmail to another online account is VaultMe, an automated and secure app that is:
- Fast. VaultMe runs exclusively on AWS (Amazon Web Services) and uses Google's APIs, so it connects directly to Google's servers and uses the most "threads" possible to copy your data. No home or office internet connection can match that.
- Secure. It uses Google's OAuth technology and never gets access to your password.
- Cost-Effective. VaultMe saves you a significant amount of time compared to manual backup methods, which can take days or even weeks of your time.
The value of your time and the importance of your email data cannot be overstated. So, assess your needs, choose the method that suits you best, and safeguard your Gmail email history.
Related articles
Want to back up Outlook to Gmail? This article explains how you can copy your Outlook emails to Gmail: How to Move Emails from Outlook to Gmail — Two Options.
Need to back up your Google Drive, too? This guide outlines your options: How to Back Up Google Drive
Thinking of backing up your Google account? See this article: How to Back up a Google Account.
Considering using Google Takeout? Learn what you can expect: Google Takeout Alternative.
Want to create your own copies of "Shared with me" items? See this article for instructions: How to copy "Shared with me" files from one Google Drive to another.
Need to back up Google Photos? This article explains how to copy Google Photos to another account: How to Transfer Google Photos to Another Account.
Want to change your Gmail address? Explore your options: Change Gmail Address Without Losing Emails and Other Data.